
Swift Bits: Menus
Context actions or filters

Menus in iOS are no longer just contextual pop-ups hidden behind long presses. Starting from iOS 14, Apple introduced a unified Menu system that works across buttons, navigation bars, toolbars, and context interactions.
Recently, for one of the apps (built with UIKit, with some parts in SwiftUI), there was a task to add filtering. Typically, a separate sheet or modal view works better — filter state handling, restoration, and persistence are more flexible with that approach. However, basic two-option sorting can be implemented inline as well.
What is a Menu in iOS?
A Menu is a structured collection of actions presented to the user in a compact, system-styled interface. Unlike alerts or action sheets, menus are:
Lightweight
Non-blocking
Context-aware
Pointer- and keyboard-friendly
Menus are backed by the different core building blocks across UIKit and SwiftUI:
When Should You Use a Menu?
Menus are ideal when multiple related actions exist, but none of them is primary enough to deserve its own button.
✅ Good use cases
Sorting & filtering
Display mode selection
Secondary actions (Share, Duplicate, Rename)
Overflow actions (••• buttons)
Toolbar or navigation bar actions
Examples:
“Sort by Name / Date / Recommended”
“View as List / Grid”
“More” button in navigation bars
❌ Avoid menus when:
There is a single primary action
Actions are time-critical
User must discover the action immediately
The menu hides destructive actions too deeply
If the user has to guess where an action is — don’t put it in a menu.
Apple Human Interface Guidelines (HIG)
Such a UI-ish thing could not be missed by Apple Designers. We also should not skip the recommendations. Take your time to check them out: Human Interface Guidelines.

Key recommendations from Apple:
Keep menus short and scannable
Group related actions
Put destructive actions last
Use SF Symbols consistently
Avoid deeply nested menus
Menus should feel predictable, not clever. Time to create some!
Adding a Menu in UIKit
UIKit’s menu system is powerful and works almost everywhere: buttons, bar items, and even views.
Menu on a UIButton
enum SortOption {
    case name
    case date
}

var selectedSort: SortOption = .name

func makeSortMenu() -> UIMenu {
    let sortByName = UIAction(
        title: "Sort by Name",
        state: selectedSort == .name ? .on : .off
    ) { _ in
        selectedSort = .name
        updateMenu()
    }

    let sortByDate = UIAction(
        title: "Sort by Date",
        state: selectedSort == .date ? .on : .off
    ) { _ in
        selectedSort = .date
        updateMenu()
    }

    return UIMenu(title: "Sort", children: [sortByName, sortByDate])
}


let button = UIButton(type: .system)
button.setImage(UIImage(systemName: "arrow.up.arrow.down"), for: .normal)
button.menu = makeSortMenu()
//Don't forget this! Or menu will not show up instantly.
button.showsMenuAsPrimaryAction = true
Menu in Navigation Bar
navigationItem.rightBarButtonItem = UIBarButtonItem(
    title: nil,
    image: UIImage(systemName: "ellipsis.circle"),
    primaryAction: nil,
    menu: menu
)
This pattern replaces custom action sheets and is now Apple’s preferred solution.
Adding a Menu in SwiftUI
SwiftUI introduces a dedicated Menu view. It’s easy to add it like any other View. In example:
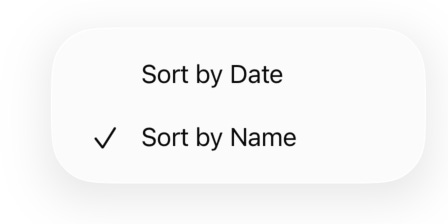
Basic Menu
enum SortOption {
    case name
    case date
}

@State private var selectedSort: SortOption = .name

var body: some View {
    Menu {
        Button {
            selectedSort = .name
        } label: {
            Label(
                "Sort by Name",
                systemImage: selectedSort == .name ? "checkmark" : ""
            )
        }

        Button {
            selectedSort = .date
        } label: {
            Label(
                "Sort by Date",
                systemImage: selectedSort == .date ? "checkmark" : ""
            )
        }
    } label: {
        Label("Sort", systemImage: "arrow.up.arrow.down")
    }
}
If you want a more scalable approach:
Menu {
    Picker("Sort", selection: $selectedSort) {
        Text("Sort by Name").tag(SortOption.name)
        Text("Sort by Date").tag(SortOption.date)
    }
} label: {
    Label("Sort", systemImage: "arrow.up.arrow.down")
}
Menu in Toolbars
.toolbar {
    Menu {
        Button("Refresh") {}
        Button("Settings") {}
    } label: {
        Image(systemName: "ellipsis.circle")
    }
}
Submenus
We can easily add a submenu. Just keep in mind:
Submenus should not be too different from other menu items meaning
Don’t overuse the logic. Submenu in submenu is to much. It’s not West Coast Customs branch of “Pimp My Ride“ )
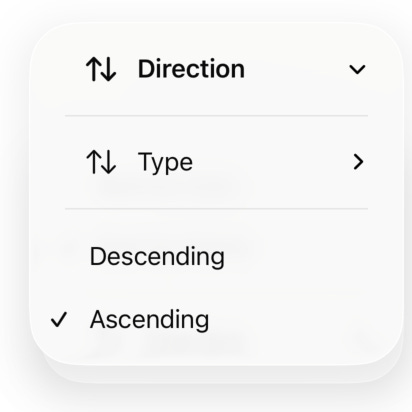
Menu un Submenu… Menu content hierarchy for Submenus is reversed. If you want to have it below other option → put it on top like in example.

enum SortOption {
    case name
    case date
}

enum SortDirection {
    case asc
    case desc
}

@State private var selectedSort: SortOption = .name
@State private var selectedSortDirection: SortDirection = .asc

Menu {
    Menu {
        Picker("Direction", selection: $selectedSortDirection) {
            Text("Ascending").tag(SortDirection.asc)
            Text("Descending").tag(SortDirection.desc)
        }
    } label: {
        Label("Direction", systemImage: "arrow.up.arrow.down")
    }

    Picker("Sort", selection: $selectedSort) {
        Text("Sort by Name").tag(SortOption.name)
        Text("Sort by Date").tag(SortOption.date)
    }
} label: {
    Label("Sort", systemImage: "arrow.up.arrow.down")
}
Final Thoughts
Menus are no longer a secondary UI element in iOS — they’re a core interaction pattern.
They:
Replace action sheets
Reduce UI clutter
Scale naturally from iPhone to iPad and Mac
If your app still relies on custom “More” sheets or overloaded toolbars, it’s probably time to switch to menus.
Did you know that you can also have selection state when the UIMenu is in the top navigation?